I am just coming to the end of my visit to Zakład Makerspace, which is a giant makerspace in Poznań, Poland. I have been attending a conference there called Poznań Seminar which has been set up by the Vulca Project. I will break documenting this event into a couple of posts. Here, I just wanted to share some pictures and information about this amazing site!
Zakład Makerspace was founded in a disused chocolate factory. When the space was initially set up the factory was derelict, many rooms were in very poor condition and water and electricity supplies needed repairing and installing. On the 1st floor, some machines and ovens from the factory are still present. One of the volunteers described how there was an inch of ancient chocolate caked on the floor which needed to be cleaned!
Zakład Makerspace is a non-for profit space which is largely run by just a handful of volunteers, and is supported by membership fees. Income is also generated through a co-working space, rental of facilities, events and occasional contracting jobs. Makers who make a profit from their practice make a small contribution to the space.
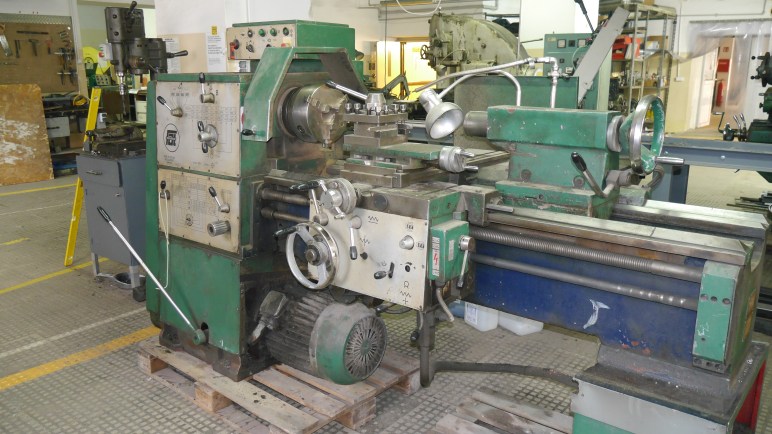
The Metal Workshop
The metal workshop is a large and impressive room which has two large lathes amongst an array of other machines, apparently people come from all over Poland to learn how to weld in Zakład. The machines have come from a variety of sources, some sponsored, some donated and some acquired by the space. Some of this machinery had only just arrived at the space when I visited.
Each of the workshops hosts monthly inductions for new members and from a conversation I had with one of the volunteers there are some further inductions and rules of use around some machines. The space as an organisation is in need of some individuals to come in with skills as not all the equipment can be utilised at present.
The Wood Workshop
Next door to the metal workshop is the wood workshop. This also has a host of machines including a large flatbed CNC – a good range and well maintained set of handtools and a couple of machines I didn’t recognise. One focus of activity in this space is the upcycling and reuse of discarded furniture. I also saw some amazing traditional acoustic instruments made by local maker Anton, who was also and expert at playing them (I will save this for another post).
Textiles / Sewing
Upstairs can be found a large textiles space which is host to a number of domestic and industrial sewing machines in different conditions, an over-locker and a wide range of hand tools and sewing materials. There is plenty of tabletop space and materials for making here, and the space is clearly well maintained.
Electronics and Tech
Distributed around the first floor are some electronics workbenches with soldering irons and bench test gear – a lot of this stuff is pretty old, but pretty cool looking – I found a ‘digital’ volt meter that has a Nixie tube display (pictured), these are old Russian vacuum tubes – in their natural environment for once! There were also large printers, 3D printers and a miniature CNC and lathe scattered around.
Co-working Space
Other than the 50 or so members that use the makerspace, there is also a co-working / shared space on the 1st floor – without sharing too much as I don’t have anyone to ask permission, it looks like people could be working in software or design here, and there are also some ceramics and textiles projects set up.
Storage
Finally, and integral to a large space like this – Zakład has a huge storage area on the ground floor. I think members can rent storage by individual pallet.
So – I hope you enjoyed this post. It is an amazing and expansive space, imagine what you could make here! The volunteers I have met are lovely – if you are a maker you should consider a small excursion. I stayed in a hostel about 10-15 mins away from the space, and it was about £68 to stay for 4 nights, which is very agreeable. Let me know what you think in the comments below.
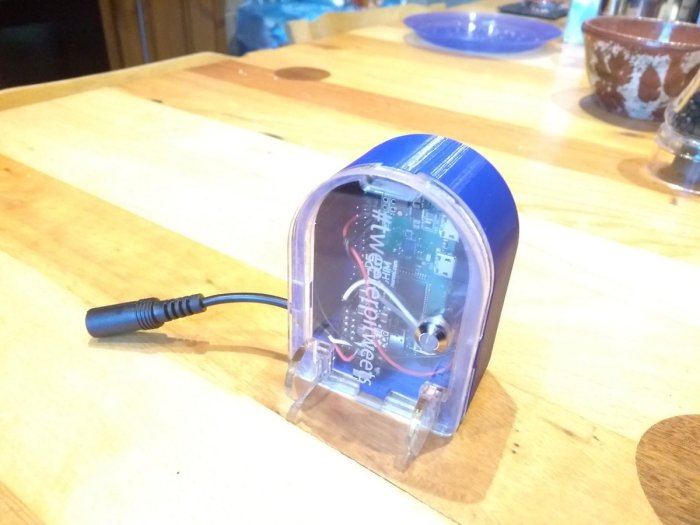
This year I decided to do some making for Christmas and now the gifts are out and the surprise is over I can share them with you! I managed two projects, and it turned into a lot of work! This is the first which I called TweeterPiTweets:
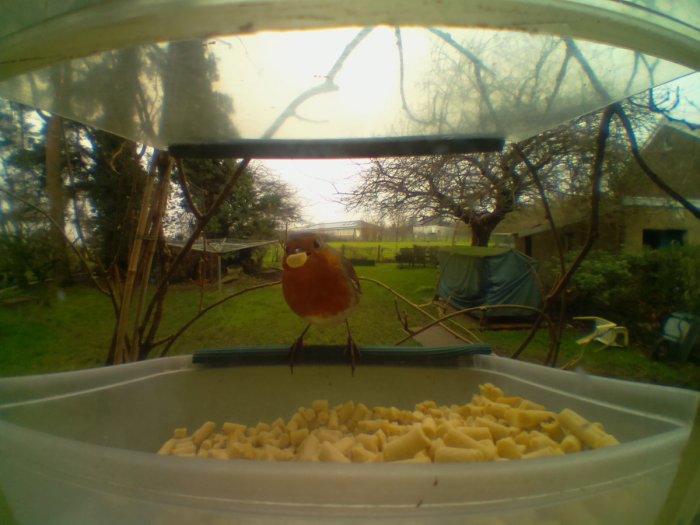
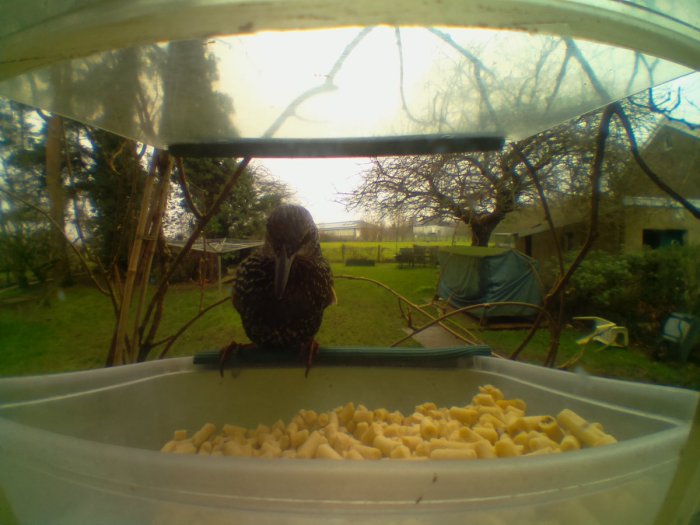
You can probably guess a little about what this device does from the images – it is an automatic camera that responds to motion and then tweets the captured images. I made this project for my parents as they have a perfectly placed bird feeder on their kitchen windowsill – so the idea is to capture images of the visiting garden birds. After a little bit of tweaking I think I got this device working effectively and from the first day it is has been running we already have some impressive results!
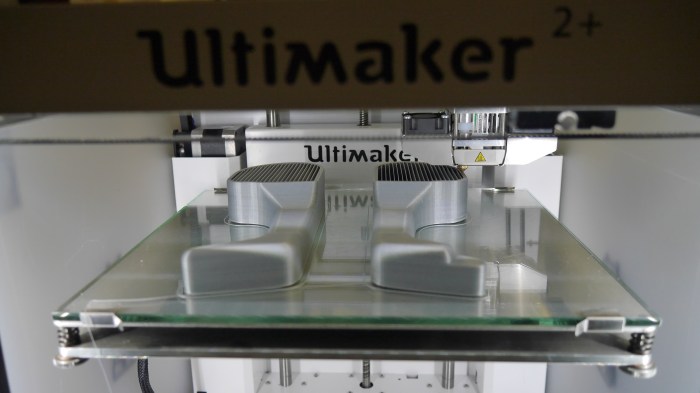
I made the enclosure in Cardiff FabLab, the front half is 3D printed and the back pieces are laser cut layers – I intended for there to be just two separate pieces, with a single laser cut back piece fitting in to the 3D printed front, but I underestimated the depth of the parts inside hence the extra layers.
In the end I ditched using the PIR sensor – there are some many aggravating nuances to getting it working correctly, and it turns out that infrared wavelengths don’t pass through glass so well anyway (just as a small tip though, the PIR sensor seems to work a lot better if you bypass the 5V regulator and power it directly from the Pi’s 3v3 rail, despite have a clean regulated output from the Wide Input Shim!)
It turned out that actually using the Pi Camera as a motion sensor was much much better. Gareth Halfacree (@ghalfacree on twitter and @ghalfacree on GitHub as well) has created an awesome bash script that is designed for camera trap set ups. The idea is that the camera constantly takes low-resolution images and scans for pixel changes between the latest and preceding images, if a change is detected then a high-resolution image is taken. There are a number of variables in the script that allow you to define a particular area of the image to scan for change (so you can ignore things like branches waving in the wind for example) and you can also tweak the sensitivity and thresholds for successful triggers.
I combined this script with Tweepy, a Twitter client for Python to get the final result.
I had to build this project with a pretty strict time limit which is why hardware issues haven’t been totally resolved. If you liked this post, let me know in the comments below and in the new year I will find time to upload a full tutorial 🙂
Kim and I just got back from Electromagnetic Field Camp 2018 – a bi-annual festival celebrating all things hacking and making. It was a spectacular and unique event with a huge amount of fun to be had.
The purpose of this post is to share a collection of photos we took at the event…
You are welcome to share this page and our pictures!
We might have some more pictures and a video or two to share still as we sort out our other devices! Stay tuned!
The Event
EMF had a special badge for participants – it was a pretty featured hackable microcontroller dev-kit… well actually it was closer to a fully featured hackable mobile phone as it included a GSM module and antenna. It also had a bunch of sensors, built in WiFi, buttons and a colour LCD. I had some trouble actually hacking the badge as my laptop doesn’t deal well with native usb serial ports, but did manage to get some things going…
The entire camp had a temporary GSM and WiFi network set up – this along with power was distributed somewhat hilariously via jerryrigged portaloos, the beacon on top would spin energetically visualising the amount of traffic at the hub
It wasn’t unusual to find WiFi radio boosters in odd locations around the site:
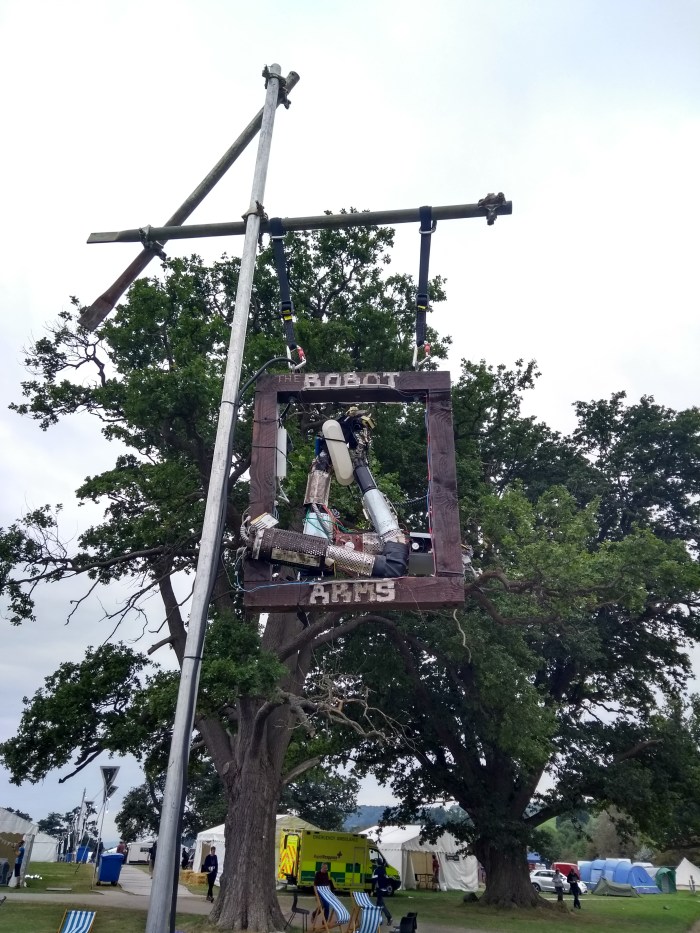
The Robot Arms was the biggest watering hole for thirsty hackers on site. The bar like much of the festival was largely volunteer run…
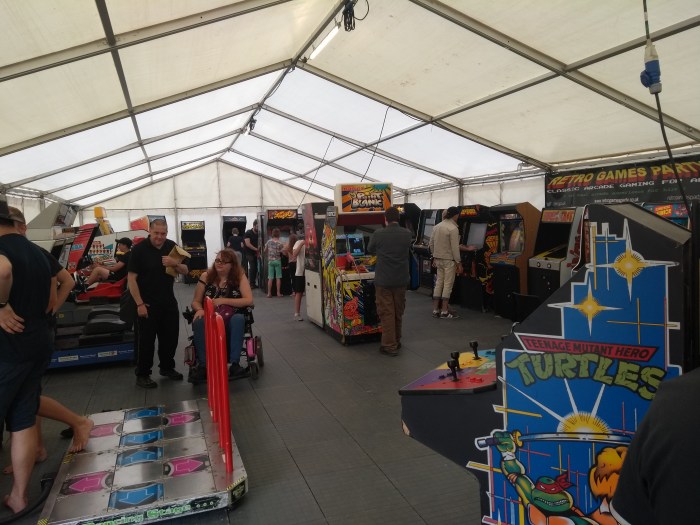
There was an awesome, I mean AWESOME arcade tent at the festival with a number of rescued classic machines including Star Wars, House of The Dead, Mortal Combat, Frogger, Space Invaders and much more – we spent a good amount of time in there!
Activities
There were far too many interesting things going on at once, it was impossible to see them all (and often too interesting to remember to take photos!)
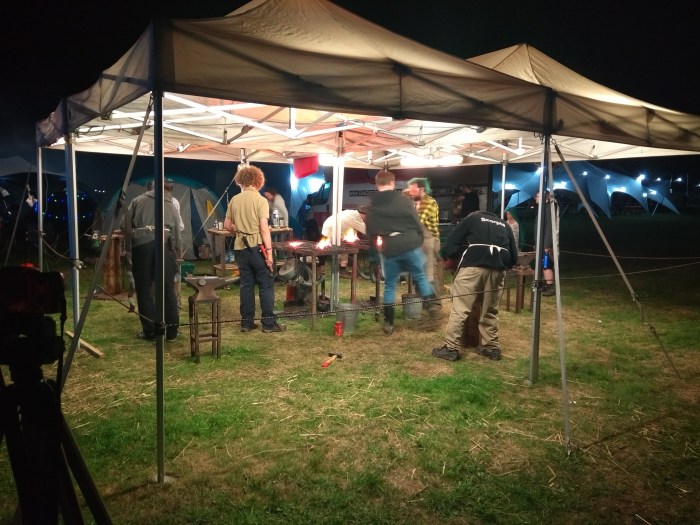
These guys were running a blacksmithing workshop from about 8am to 1am every day!
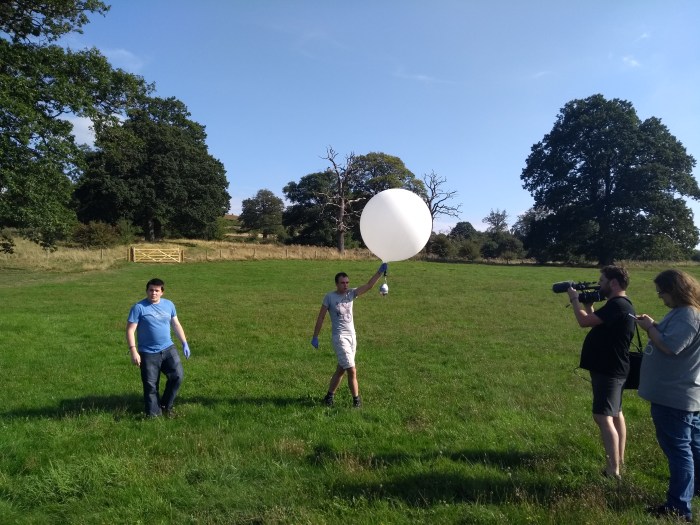
A high altitude balloon launch by the HABHUB Village crew:
Robots
There was of course a very healthy serving of robots, mechs and automata…
I think this little guy was the EMF Roamer, you can see on the flag there is a QR Code to scan, scanning the code would take your phone to a webpage with a live stream from the robot, and a set of controls so you could drive it around the site!
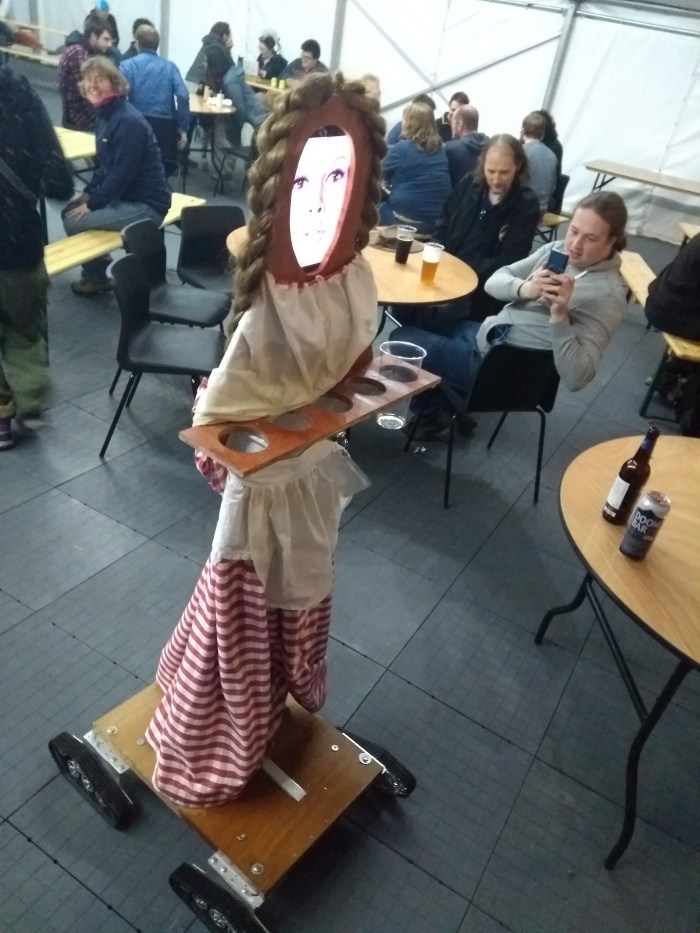
Cat automaton, not sure if this is what it is actually called!
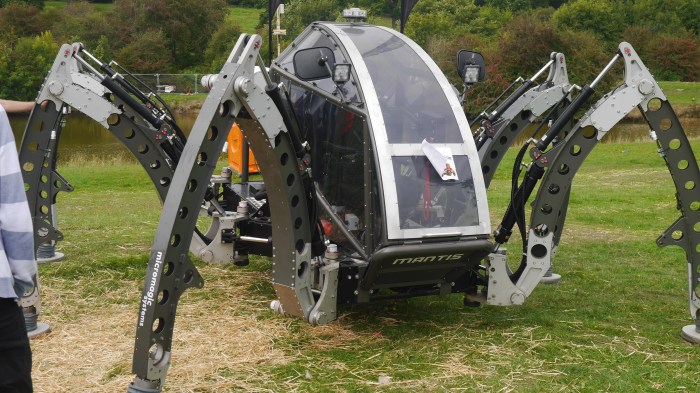
The Mantis – a giant mech with cockpit and serious industrial actuators, they must have needed a fair sized truck to bring this in!
Credit: Kim
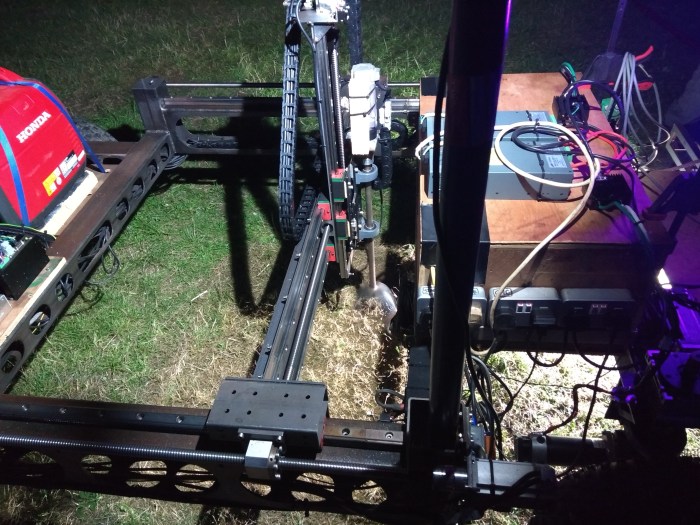
I think this was some kind of large CNC farm bot with a rotary ploughing bit:
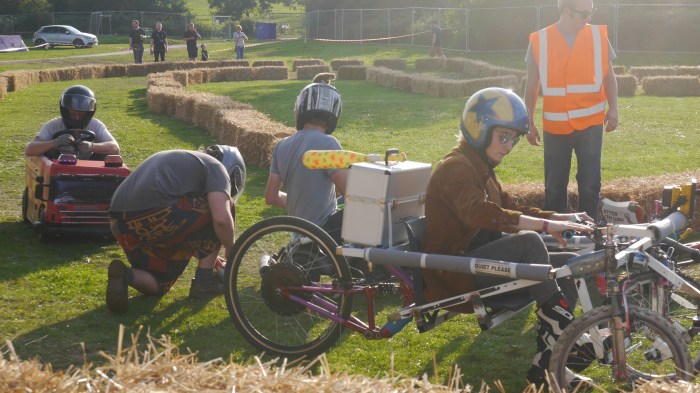
Transport / Hacky Races
Many attendees were smart enough to consider bringing on site transport, and these devices were seen in use transporting goods and mail around the site, ferrying passengers and taking part in “Hacky Races” on an improvised hay bail track:
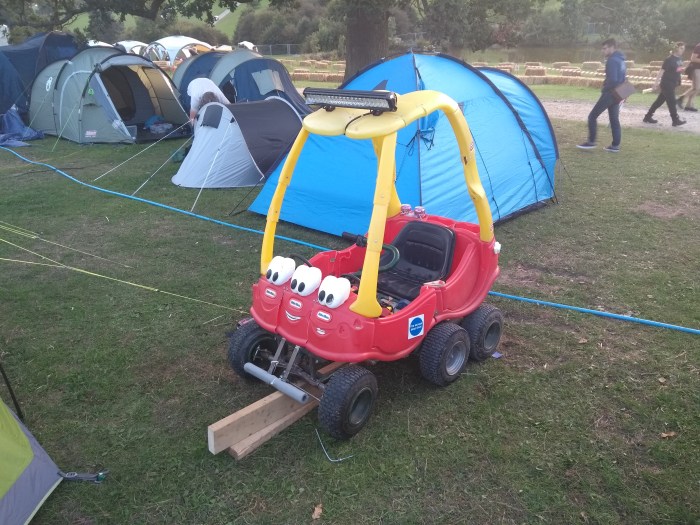
This monster:
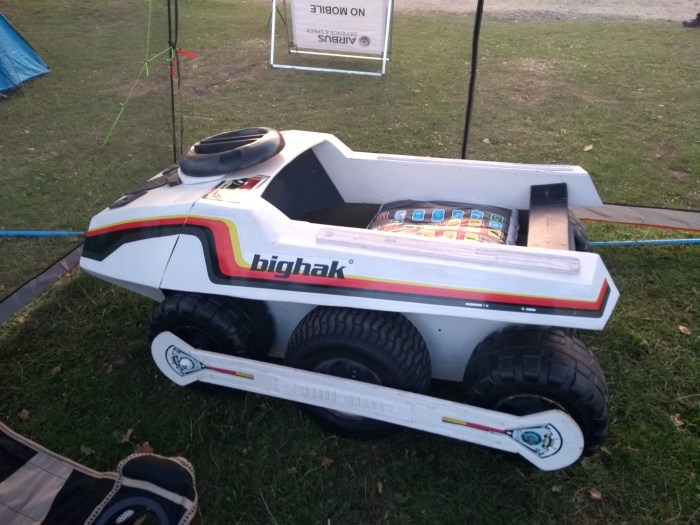
This wagon:
Hacky Racers:
Credit: KimCredit: Kim
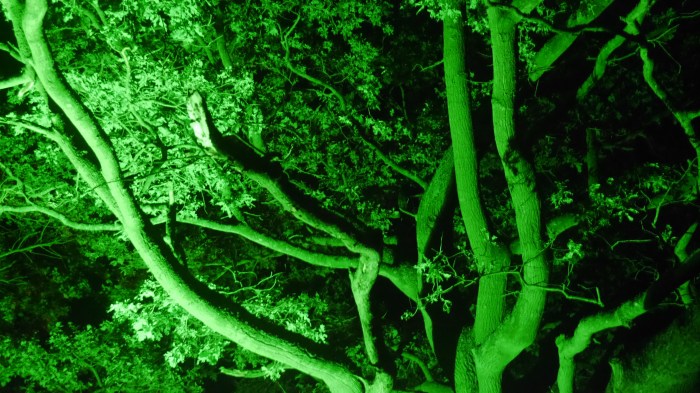
The camp at night:
At night, the lights would come on! There were approximately 37489032.421 programmed RGB LEDs on site:
Credit: KimCredit: Kim
More night smithing and smoke coming from the Netherlands Village rave:
Credit: Kim
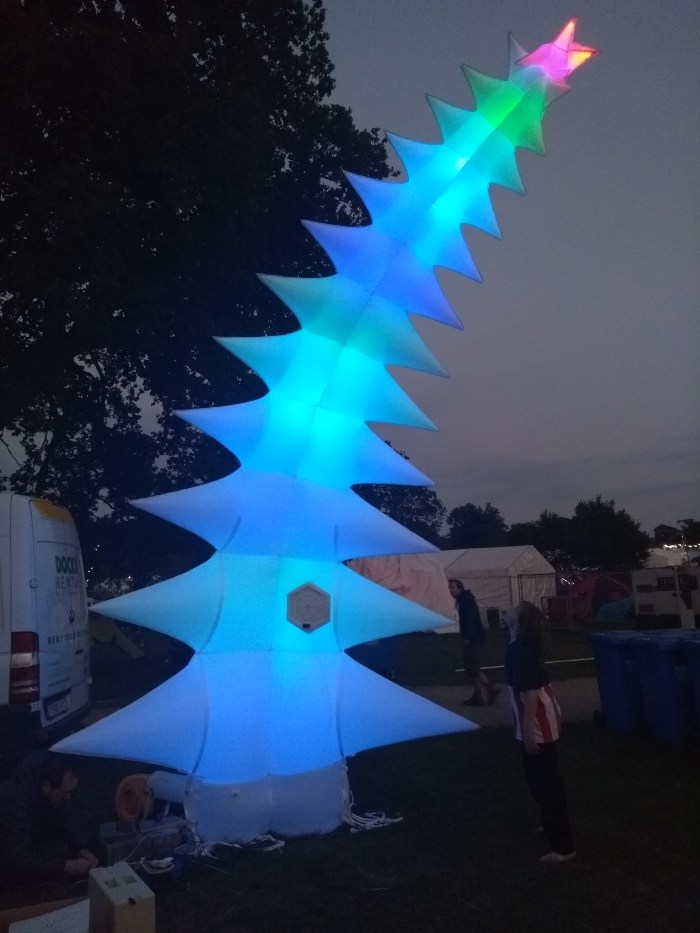
Richard Sewell from Bristol Hackspace makes these crazy fabric inflatables which can be automated or controlled by a microcontroller. Servo controlled air vents on the sides of the sculpture allow quite a degree of movement:
Credit: Kim
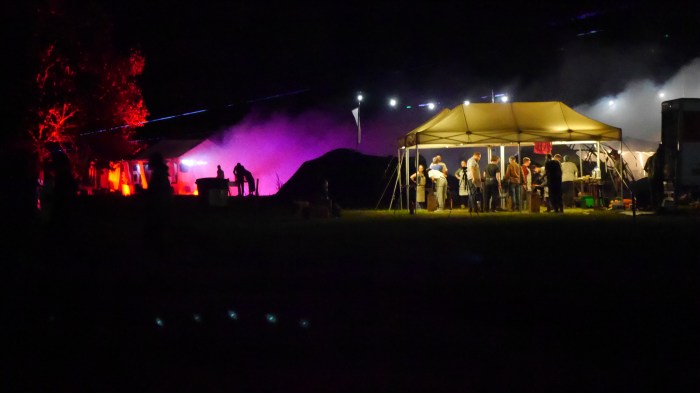
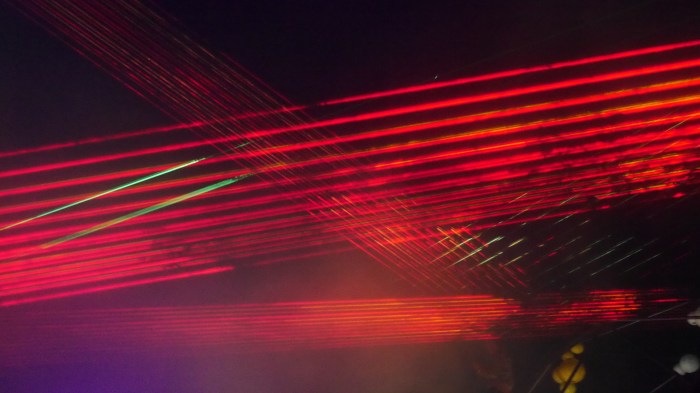
Null Sector / Cybar
On the first night as we were wondering around, we noticed the sky lit up with giant laser beams emerging from an ominous plume of fog at a previously quieter section of the camp – as we walked closer we heard pumping techno and drum and bass emerging from this oddity. It turned out to be Null Sector (Or Cybar??) – a collection of shipping containers fenced together to form a makeshift techno club from some dystopian cyber future. Again I can only describe this happening with emphasis: AWESOME!
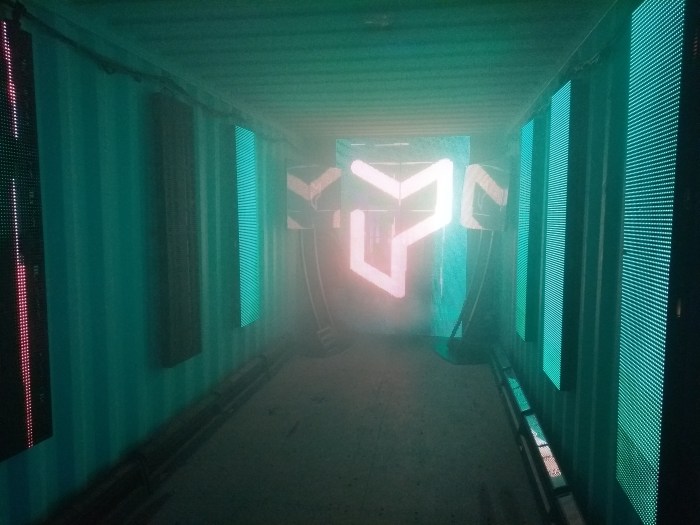
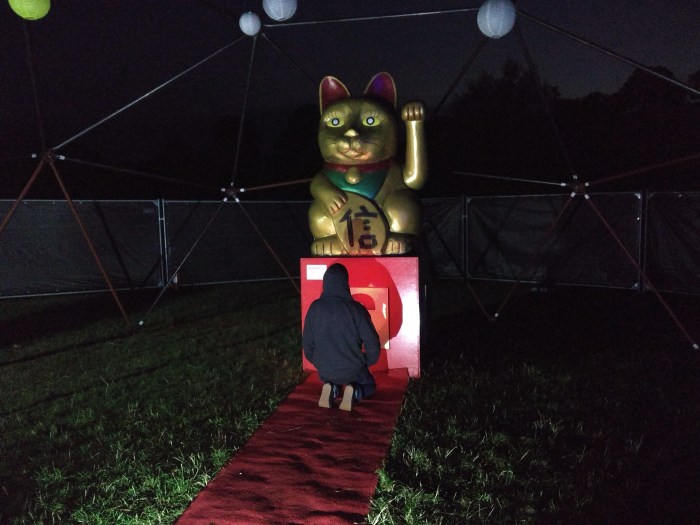
Null Sector was a club, night time market, bar and a second “Cardboard Arcade” which was made up of Indie video games. Lasers, pyrotechnics, audio-visuals, fog and not to forget the gigantic fortune telling Maneki-neko!
Credit: Kim
This was an A/V installation in one of the containers:
The cardboard arcade:
The night market:
Credit: Kim
Worshipping the giant maneki-neko!
We had an incredible time, we met lots of people, we learned stuff, we hacked, we missed lots of interesting things too – there was too much to do!
Big thanks to the organisers and volunteers who made EMF Camp 2018 happen – I hope there are many more!
Coming up rapidly now is the annual Maindee Festival in Newport. Over the last couple of months I have been attending group discussions around the setting up of a Makerspace in Maindee, and we are now looking to the festival to be our first public facing announcement of it being a thing.
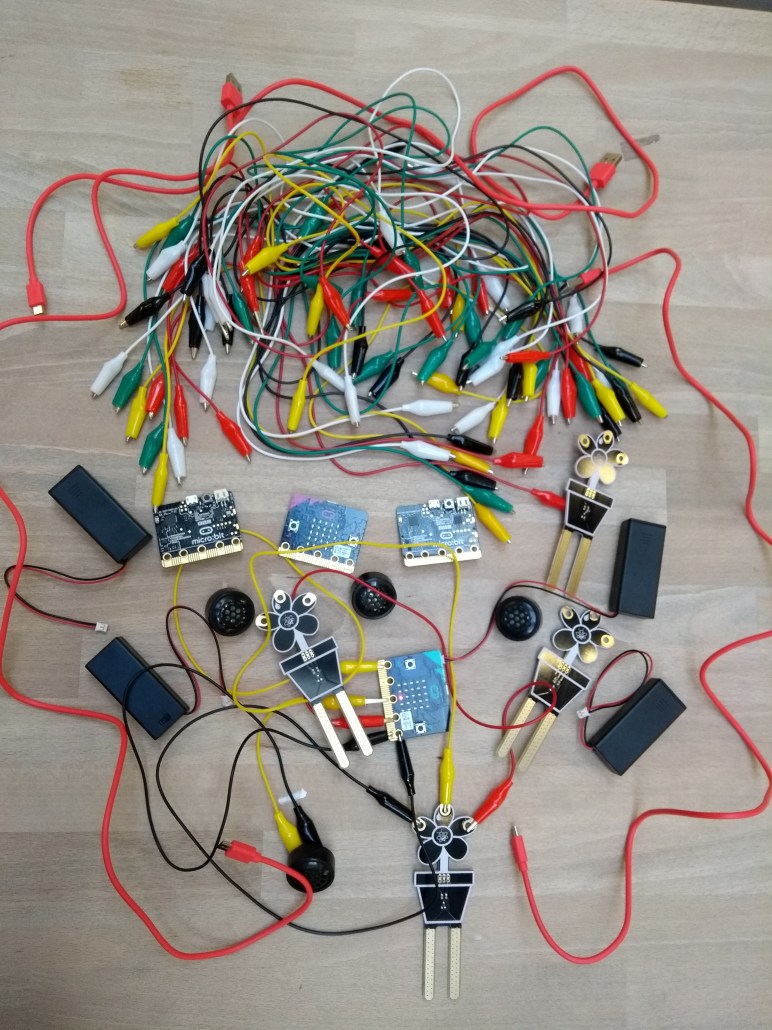
The festival is themed “The Incredible Edible” so we have been brainstorming around some garden hacking ideas like my recent IoT project. I’m running a free hacking workshop for children and families with some other volunteers based around the BBC Micro:Bit, utilising soil moisture sensors and buzzers.
If you are interested in attending, the workshop is drop in and everything is provided. The festival takes place on Saturday the 7th of July, there will be other Makerspace activities, music and more, more information about the festival can be found here.
If you are wondering, I haven’t been stuck at Tiree for a couple of weeks, I just didn’t get round to posting this final update! This blog post is long, and covers the multiple projects I was involved in at Tiree Tech Wave.
For the duration at Tiree I worked on four projects, as documented to some extent in my previous blog posts. These were:
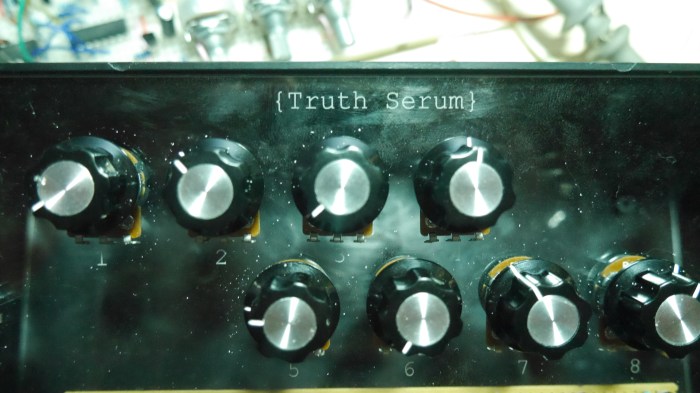
“Truth Serum”, an Arduino Due based MIDI sequencer
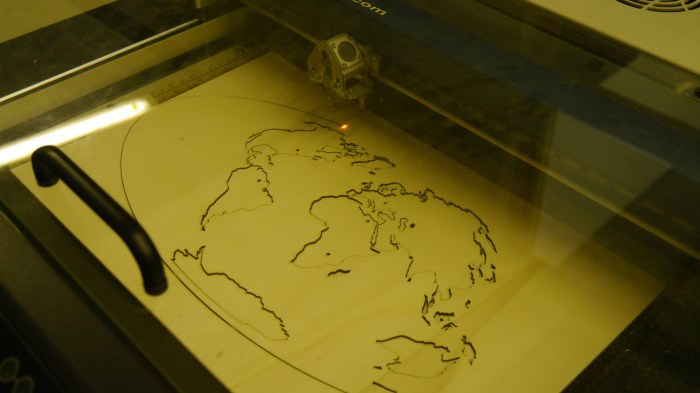
“Touch Map”, (that’s my unofficial name for the project) a rear-projected, laser-cut map of the world made from wood, acrylic and brass pins. Touching the brass pins plays video and audio files. (Teensy and Max/MSP)
“Physical Tweeting”, (again, my unofficial name) RFID tagged objects that send Tweets upon detection. (Raspberry Pi, Python and Node Red)
Circuit Playground generative light experiments
Truth Serum
Truth Serum is an idea that I have bounced around in my head for some time – to make a sequencing tool for my Hordijk Modular and other MIDI capable instruments, but mainly for the Hordijk system as it doesn’t have dedicated sequencing built in and does have a MIDI input socket.
I worked on the enclosure to some extent before leaving for Tiree, but left all of the wiring and programming to do on site. I worked on the project solidly for the first two days of the Tech Wave and got basic MIDI note sequencing going in that time:
The ongoing aim for the project is to have a flexible controller that is capable of traditional and non-traditional forms of sequencing. The project includes the following controls:
8 Potentiometers
2 Encoders (left)
2 “mode” buttons and 2 “function” buttons
8 toggle switches
The panel also includes 16 3mm yellow LEDs and 2 RGB LEDs.
Before I left for Tiree I did some research into the feasibility of all the hardware and uncovered a couple of issues in my plan. The worst one was that I planned on controlling the LEDs in a matrix as I thought this would save on eating up digital pins – my basic plan was to have 8 anode pins and 2 cathode pins, you could think of these like X and Y controls for the matrix – the idea being to only have a single row active at a time. I planned on having two arrays (lists) which would have the LED states stored for each row (eg IOIIOOOI), and then by simultaneously rapidly cycling between the two arrays (writing to anodes) and activating the cathode pins you could create any configuration. In principle this idea is sound, but has a problem in that the amount of current you can sink to any digital pin of the Due is super low! See the specs here. Lighting multiple LEDs would require large resistors which would heavily reduce the brightness, or else risk permanently damaging the Due. I received some advice from Arduino.cc forumers on this and a couple of solutions were suggested – the most plausible suggestion I didn’t actually get explore for lack of time to order parts, and this was to use an LED matrix driver IC which could have been easily programmed from the Due and would have had effectively it’s own current supply (this is the route I will take for mark II!). What I ended up doing was to instead use a pair of NPN transistors to terminate the LED cathodes, so instead of sinking current to the pair of Due pins I used them to activate and deactivate the flow of current through a transistor:
I am very glad I looked into that before leaving for the Tech Wave! I decided to use 470Ω resistors as current limiters in the end as these still put out a fair amount of brightness and meant I was well within the safety limits for the Due, here are the LEDs under test at Tiree:
Once wired up, I tested all the hardware and found a few more problems – the buttons are spring latched as opposed to momentary. I can live with latching for now, but momentary would have been more flexible for programming (think tap-tempo and the likes). That’s something to fix for a later hardware revision now. The other problem is that the encoders are jumpy as heck and I haven’t figured out the magic ingredient to debounce them just yet. I tried using methods that work on an Arduino Due or even a ATMEGA32u4 based board, but these make the Due crash as they include delays (which in fairness shouldn’t actually work on the other boards either). I tried debouncing with soft switching and time based conditionals but didn’t get substantial results from this either. I opted for software debouncing instead of hardware (where you basically add some capacitors to the encoder pins) as I normally implement them this way. The encoders are an ongoing problem to explore and fix.
Hardware MIDI was something totally new for me and it took a little effort to get it working at all, this was mostly down to some bad solder joints. So it was satisfying to hear the sequencer spring to life! Truth Serum in its current state plays an 8 note sequence, a function button starts/stops the sequence and the potentiometers set the MIDI note for each step over a 5 octave range. The F1 encoder sets the sequence clock rate, but doesn’t work well or reliably at present.
You can download the code in its current state here if you want to take a look (I probably reverted the encoder programming to very basic functionality in that version). Variables are spread across the tabs which in hindsight is a really dumb way to work as I have to rearrange things everytime I make a change! I think for the sake of sanity they should all be on the top level tab even if this makes the code less readable.
One other issue that came up is the interface for the Reface DX synth I used for testing becomes very slow to respond when the sequence is playing – I’m not sure if that is my fault at the moment and will need to run some analysis to find out.
Touch Map
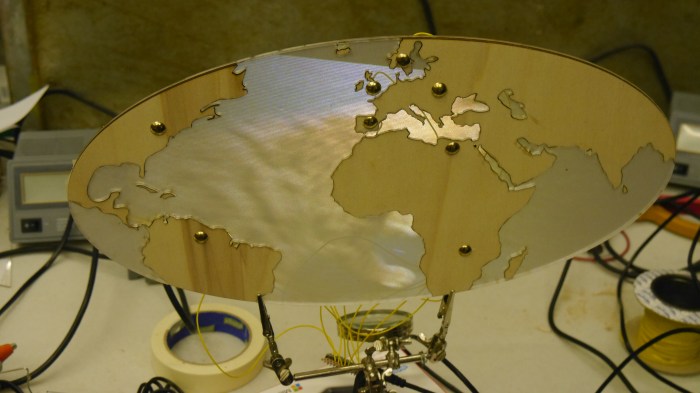
The touch map is a collaborative project carried out by FabCr8 members, the premise of this project is to develop some kind of interactive display that highlights Cardiff Metropolitan University’s international relationships. The grander idea is to have beautiful sculptural map of the world with perhaps touch sensitive copper trace lines running around countries or continents, and for it to run user uploaded video and soundbite content when interacted with. We rapidly developed a prototype that was a laser cut flat map of (most of) the world, made out of wood and acrylic that could be rear projected onto. We used a miniature laser projecter for the rear projection.
While being a little bit rough and ready, it looks surprisingly good in action, particularly in the dark. This was an idea generated by the group over the period we were at Tiree and constructed with the limited materials we had on site!
I contributed the electronics and multimedia development of this prototype which consisted of a Teensy setup and sketch based around capacitive touch and a reactive Max/MSP and Jitter patch. When the Teensy detected a touch on one of 8 points, it would send a MIDI message via USB. Max/MSP looked out for this message and would play one of 8 videos+sound in response. There are some nice tutorials on this blog already for working with Teensy and Max/MSP in conjunction.
Physical Tweeting
This was also a FabCr8 group effort with the same objective, though with perhaps a little less direction towards a solid outcome! 🙂 There was an interest in creating RFID tagged objects that could be exchanged or displayed in some way e.g. objects that were brought to the University from of for trips – the idea being that through RFID tagging the objects could have some media associated with them. It was widely agreed that RFID could be an interesting and flexible format to work with regardless. I hadn’t done anything like this before and got my teeth stuck in.
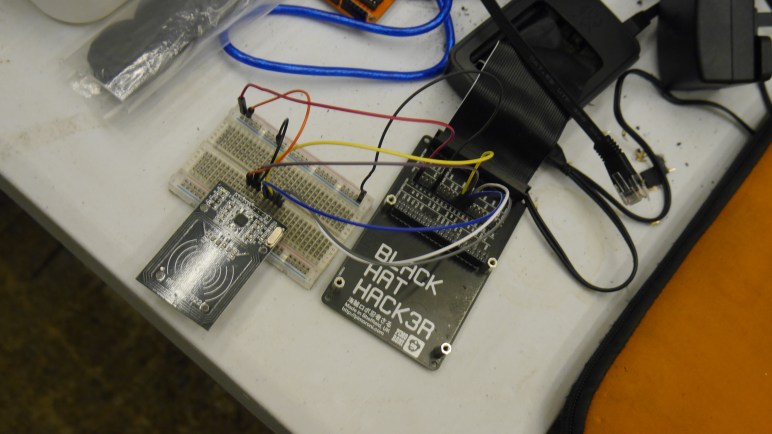
I had a basic idea that a device could be looking for UIDs – a unique identification number that each RFID tag holds – and upon detecting a recognised UID would send a Tweet. The idea was from there, a computer anywhere in the world could be looking out for particular tweets and could react to them in some way, such as by activating a piece of media. That was the rough idea. The multiple object idea was adapted by the group eventually into another world map, but this time on a 3D shape (I forget which type this is – geek level downgrade!) with RFID tags stuck on the faces, the idea being that if the shape was placed on a plinth with a particular face (a country/continent) highlighted to the viewer, then associated media content would be played on a linked device:
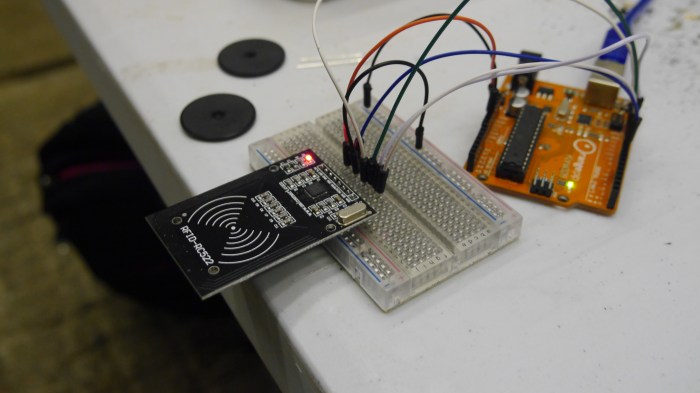
I first created an RFID detection sketch using Arduino, just to get an idea of how the data was handled (I’m more comfortable working with Arduino code). Once I had this working I then started porting the basic idea to a Raspberry Pi 3. The Pi 3 is a fully functional computer with a GPIO breakout, Bluetooth and WiFi connectivity and more. So it was a pretty ideal choice for prototyping around this idea. My skills in Python programming are really not up to scratch however, so getting this basic program to work ate up a good chunk of time at Tiree. I used a Python library for the RFID-RC522 reader which can be found here and made an adaption of the RFID-read example script for the project. The way I started out was to read RFID tags and print the detected UID to the Python virtual console, I scribbled these down and then adapted the script to look for the known UIDs, and to print a “Object x Found!” message in the case of detection.
That part wasn’t too bad, but where I struggled was actually trying to get that data out of Python in some useful form. I spent a fair amount of time barking up the wrong tree as I didn’t know the right question to google. I had already planned to work with Node-Red which is a web based visual programming app, very similar to Node-JS. Node-Red is designed for making web connected device to device communications very simple. That said, it is still pretty horrifying if you don’t know what you are doing! 🙂 Eventually I had help from another Tech Wave attendee, Tomas, who taught me about Web Sockets and helped me set one up in my Python script – I might struggle a little to set this up again, there were a couple of address settings that we whisked through without making a note of. Next time I will go through it a little more carefully and at least I have a tried and tested method.
So the final script detected individual UIDs and would then send a string via a web socket to a web tool built in Node-Red (which I don’t really understand at present so can’t explain too well). I used this web socket client library for Python which was pretty simple to set up. The Node-Red tool was also very simple, it just passed the unmodified string on as a tweet to a Twitter account I set up specifically for that purpose – you can have a look at the account here if you really want to, but there isn’t much of interest going on 😛
I found a small issue with the current setup in that Twitter would reject identical Tweets that were posted in a short time period. I tried to remedy this to some extent without success – I hoped to add a simple script in the pipe line on Node-Red that would take the string “Object x detected!” and make it “Object x detected for the nth time!”, so each tweet would be a little more unique – this was however beyond my skill level even though it may sound simple.
I felt like I achieved a lot with this project even though it didn’t get particularly far – I learned a lot of super useful stuff which I will surely be putting to use in other things in the near future! I really want to explore IoT connected devices more and it looks like web sockets and Node-Red will be instrumental in making interesting things happen. I will document my progress as I go and hopefully make it less painful for others in the future 🙂
Circuit Playground Experiments
Finally, in the spare snippits of time where I wasn’t making other things or drinking! …actually I did some of this stuff whilst drinking… I got to know the Adafruit Circuit Playground. The Circuit Playground as far as I can tell is an American answer to the BBC micro:bit with similar goals – to improve computer science skills in education. The hardware is currently under development but pretty much complete as far as I can tell, and Adafruit released a “Developer Edition” board to get some community input and testing. The board is pretty fun as it has 10 programmable RGB LEDs built in, an accelerometer, temperature sensor, light sensor, buttons, switches and a microphone and speaker! It is laid out as a wearable board so you can sow conductive thread to the pins just like a Lilypad. It is certainly a superb board for education and anyone wanting to cut their teeth with micro controller programming. I picked up a board from Cool Components in the UK who have a few in stock and it arrived just in time for Tiree.
I made a couple of fun sketches for the Circuit Playground which you are welcome to try if you have one. The first one is a touch sensitive generative light sensor:
I also made a sketch to play with the inbuilt buzzer – it can actually play musical pitches fairly accurately! This sketch plays a random sequence of notes from the major scale and adjusts the tempo depending on how much light the light sensor detects, because you know, computer science!
The Trip Home
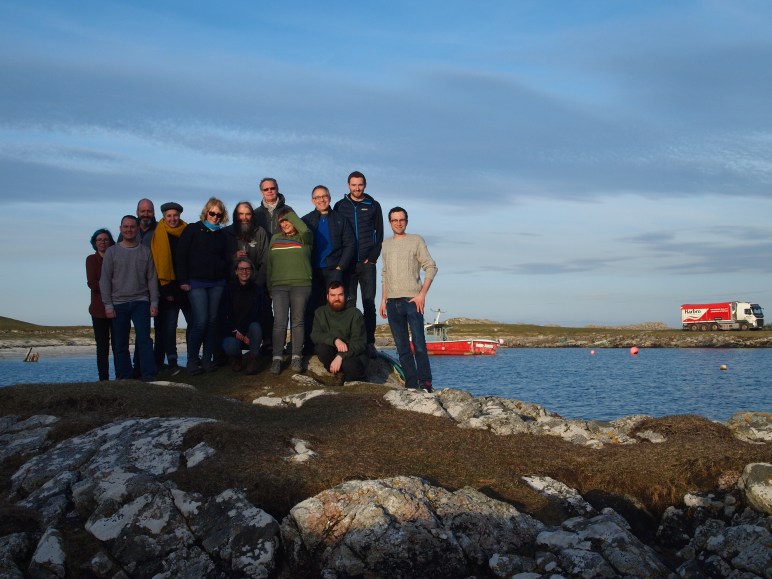
What an amazing time spent with amazing people! Thank you to all involved should you see this message! And well done for reading this essay!
(photo from Charlie Bull)
So that is it – all that in 5 days was pretty full on. The journey home was about 16 hours long and made painful by huge stretches of motorway road works. We did stop at Loch Lomond on the way back which was stunningly beautiful on a misty day:
We also had an awkward sing along session that went on for about 8-hours – that must be some kind of record, though I doubt anyone was keeping tabs!
Today I focused on two of the projects being developed by the group, one is a wood and acrylic laser cut map of the earth which has been glued together to form a rear-projection screen. The map also has holes ready to wire capacitive touch sensitive points. I have been working on a Teensy sketch to sense touch from those points, and in response is sending MIDI signals into Max/MSP to trigger audio and video events. Hopefully that will all be constructed and functional on Monday.
I also worked on my RFID object detection for the other project, which is now shaping up to be a dodecahedron shaped globe with RFID tags on multiple edges. I don’t know exactly what the outcome will be but the idea is to somehow trigger video by turning the object to different positions. So, I developed a python script on the Raspberry Pi to only update when a new object is detected, and send a message in such a case. I wanted to get that message to Twitter, with the idea that a seperate machine could be watching a Twitter account and could react to particular messages. Though I haven’t used it before, I figured the Node-Red software on the Raspberry Pi would be ideal for this. I spent a couple of hours in frustration over how to actually implement it as I haven’t ever done anything lke it before, but eventually got some help from a chap called Tomas who helped me set up a web socket client in python, and things came together very quickly from there and I was able to send strings straight from python to Node-Red, which would automatically Tweet them. I will do a more detailed write up in a tutorial form at some point soon:
Some more pictures of the reader:
Back at the house in the evening I finally had a good play with the Adafruit Circuit Playground board, which is very fun! It turns out that this board also does capacitive sensing, so I worked on some generative light programming (I love RGB leds!) that reacts to touch. The touch reading I get from the pin is very low, around 1 to 5, and changes in a fairly smooth way as you cover more surface area with a touch. So I made a little sketch that generates a list of random numbers for RGB values across the 10 programmable LEDs where the brightness is capped by the capacitance level. Brightness levels for each colour on each LED adjust smoothly, and a new random number is generated once an LED has finished adjusting. When you release a touch the brightness smoothly drops back to zero – it’s pretty mesmorising to watch!
After some degree of fiddling in the morning, I finally became MIDI compatible!
I attached the wire that was missing but that didn’t solve the issue – it turned out there was a poorly soldered joint connecting to the base of one of the transistors so no data was getting out. Good times 🙂
I didn’t progress the Truth Serum project further during the day as I got involved in some of the other projects going on in the space. I worked on RFID readers for making smart objects both on Arduino and Raspberry Pi 3. This morning I will be taking the Raspberry Pi code further to hopefully send a tweet when a particular object is detected:
Some 3d Printing going on at the Tech Wave for another project:
Once we got back to our accomodation in the evening, I sat down and got stuck into coding Truth Serum a bit further. Now each of the 8 potentiometers are sampled and the data is converted into a 5 octave MIDI range. I then started some work on the encoders and ran into a lot of problems. I have them basically working, but the tricks I employ for smooth readings on other Arduino models just don’t work on the Due and encoder readings are very noisy and pretty unreliable at present – upon reading up on the Arduino reference for attachInterrupt() I found that some of the things I have done with the Uno just absolutely shouldn’t work anyway! I will need to learn some new tricks to get this right. Finally I added scanning for the row of toggle switches so now you can mute any individual steps in the sequence. It is starting to feel like an instrument now!
Much drinking followed that evening, I am sure some media is going to surface that should probably stay buried! I now know what the infamous Tiree cornflake game is!
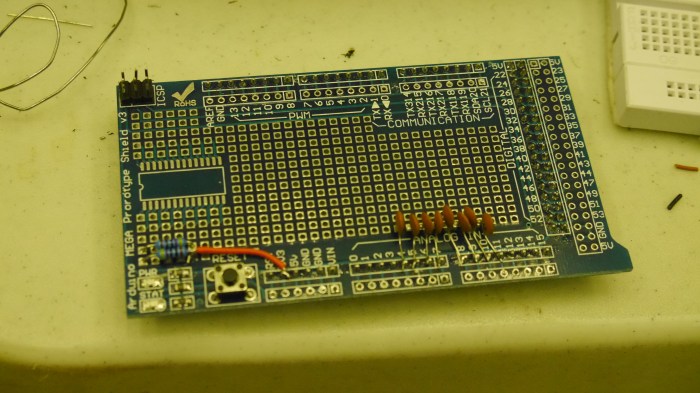
Day 2 was all about wiring, wiring and more wiring! I spent the first half of the day and then some wiring all the panel components to the slot in prototyping board I bought for the Arduino Due for a couple of quid. The prototyping board has plenty of space in the centre for building basic circuits:
The near complete box from the outside:
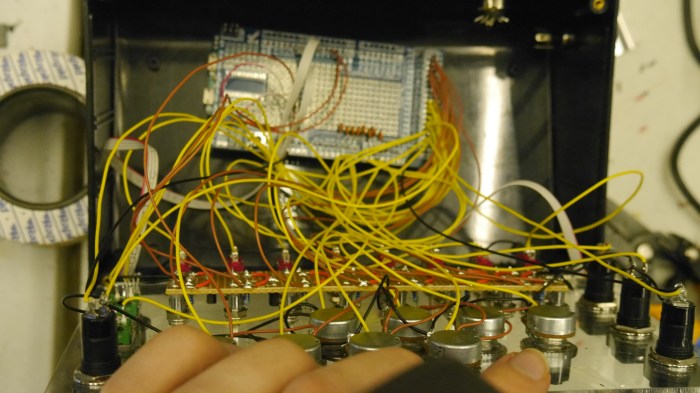
And the shear hell on the inside:
In the meantime, the crew did some serious project planning around the table for a larger group project:
Once the panel wiring was done I spent some time testing each component worked. Perhaps inevitably, the bit of veroboard I used as a structure for the 16 LEDs was riddled with problems and some time was eaten up bug fixing that. I hadn’t made any particular mistakes but a good number of the points that I had added breaks to the board didn’t actually break the copper traces effectively so there were short circuits everywhere. Anyway, once fixed the sequence worked perfectly:
I then continued by adding the MIDI buffer circuit to the prototype board, this was a slightly fiddly job but again, it was great to fit it on here and not have to cut another bit of veroboard:
At this point I was out of time again, but I had pretty much completed the hardware. Back at our accomodation though I plugged in and tried sending some basic MIDI data to the Reface DX keyboard I brought, but no luck! Upon some investigation I found that I had missed a key wire – which is noticeable on the picture above – which connects one of the NPN transistors in the MIDI buffer to ground. So that is a job for day 3!
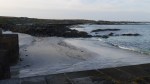
We spent some quality time on one of the beautiful Tiree beaches in the evening with some hilarious games of frisbee and probably the most disorganised games of rounders I will ever have in my life!!
It’s actually day 2 now but I had some trouble getting images off my camera – so slightly late update…
After a 9 and a half hour drive from Cardiff we arrived in Oban at around 5.30am. I had stayed up for a good portion of the night as a driving buddy. As the sun was just about to start creeping up over the horizon in Scotland, the views were breathtaking, and unfortunately I didn’t have access to my camera (though it was still very dark). We had to wait a good while to board our ferry in Oban, and the sun rose for a beautiful sunny (albeit a little chilly) day.
The ferry departed around 6.30am and the trip was long – I think we arrived around 11am in Tiree. My comrades slept through it but I was wired from drinking coffee at 3am, again the views were breathtaking on the ferry as we cruised up the straight between the mainland and the Isle of Mull – I will be sure to keep my camera close on the return.
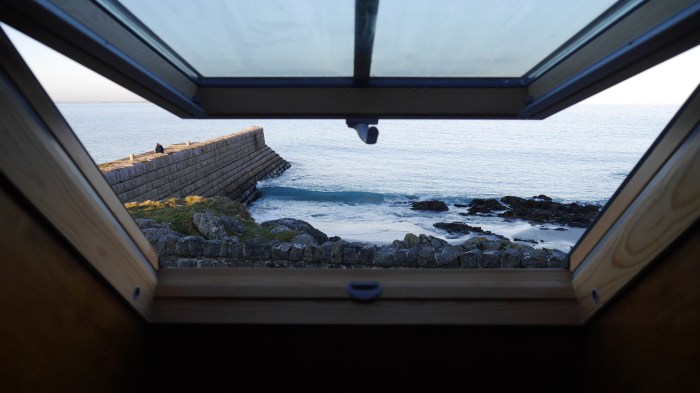
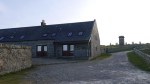
Tiree is absolutely stunning and we are lucky to have amazing weather for day 1. I took these pictures in the evening, here are some pics of our beachside accomodation (click to enlarge):
Once we had dropped off our personal items we headed over to Tiree Rural Centre which is a multi-purpose space on the island, and where the Tech Wave is taking place. And I mean multi-purpose, it is a cafe, a multi media meeting place, and a cattle market! We unloaded all the fabrication gear from Cardiff Fab Lab and whereever else, and after a short meet and greet we got stuck into building…
I had hoped to complete all wiring today in order to get stuck into code on day 2, but I didn’t make it by a long shot. I managed to cut holes in the plastic case to accomodate a MIDI socket which will be the main output I focus on, and also a barrel jack input so the unit can eventually be externally powered:
I then proceeded to wire up all power rail connections on the top board, being a ground plane and a 3V3 line for the pots:
Finally I needed to test the RGB LEDs I stuck onto the front panel as I couldn’t remember if they were common anode or common cathode. Common anode means you have one anode (+) pin and three cathode (-) pins, pulling the pins low means that current can flow and the associated colour is lit, common cathode means you reverse those rules. It turns out I have common anode, so I know how to wire up from here:
I was out of time at this point so we all headed back to camp for some extreme beach frisbee, a massive meal and wine to wash it down. Having not slept overnight, I put my head down early and slept like a log!
Next I need to draw up some basic schematics so I know exactly which pins I am going to use on the Arduino Due.
On Wednesday next week I will be departing from Cardiff on a minibus full of creative and nerdy people on a mission to the island of Tiree, to attend the March 2017 Tiree Tech Wave event. There is no real agenda other than to create a micro industrial tech complex for a week, and to see where that leads.
I know little about the event, and I have never been to Scotland! But some of the peoples I am travelling with have past experience from previous Tech Waves, and so far I have gathered that the main event takes place in a cattle shed and the entire islands internet connection runs down a single orange coloured cable. The group I am travelling with are all students or staff at Cardiff Metropolitan University, and the University has kindly sponsored our trip.
I hope to get involved in as much as possible, but I am heading to Tiree with a project plan in mind. The project is something I have wanted to do for a while and in some respects it is something I have already been working on, a hardware sequencer for music making. I could write plenty about the ideas and work I have done to date, but I will try and work that into blog posts over the next week. Here is a run down of my plan:
I recently picked up an Arduino Due which is a supercharged Arduino built around the SAM3X8E. The Due is very interesting because it is very fast compared to a standard ATmega328 based Arduino, it has more IO pins of every type, the Analog and PWM pins are capable of sampling at 12bits of resolution (that is 4x more resolution than an Uno) and the board also has built in DACs which can generate a waveform with 12bits of resolution. These features are all great for the project I have in mind.
The basic idea is to create a 2 channel multi function sequencer around the Due core. For Tiree I am focussing on having a MIDI output from the Due which I am going to use to control a miniature synth, but I would later like to add in analogue sequencing as well (I don’t want to take this on at Tiree as it will involve some degree of voltage scaling, which isn’t complicated but will probably require obscure resistor values and a more complicated power supply). The different modes are not totally defined just yet, but I would like a nice mixture of traditional and esoteric ways of generating musical notes. Over the last week I have been doing a little preparation with the hardware for the project, as I’m not sure what tools will be available (as it turns out, the group I am going with are taking some pretty extensive fabrication hardware). I laser cut the front panel at Fab Lab Cardiff, and put it together at home. The panel layout is fairly traditional, it will work well as an 8-step sequencer, but that’s boring so the challenge is to find interesting ways to rethink this traditional setup:
It is so damn impossible to work with acrylic and not get finger prints all over it! The panel hardware is made up by 8 potentiometers, 2 encoders (left), 4 buttons, 16 3mm yellow LEDs, 2 5mm RGB leds and 8 switches to play with. Two buttons are designated as “mode” buttons to change the function of other controls, and the main sequence algorithm. As you can see I built a little jig for the 3mm LEDs which will make wiring a little less painful. I also have a MIDI DIN socket and power jack to tack on to the plastic body somewhere.
This post is getting long so I am going to bring it to an end now and say that I will be posting daily blogs of what’s going on at Tiree Tech Wave, and I would like to write about this project in plenty of detail within that. If you read this far I guess you are interested so please, watch this space! 🙂


 The ongoing aim for the project is to have a flexible controller that is capable of traditional and non-traditional forms of sequencing. The project includes the following controls: